Submitted by Cindy Cockell
The border measurement is the width or length of the quilt plus twice the width of the border plus 2” grace.
One thing to remember when cutting… you must cut the borders on the same stripes. You must also sew the same stripe edge to the quilt on all 4 sides.
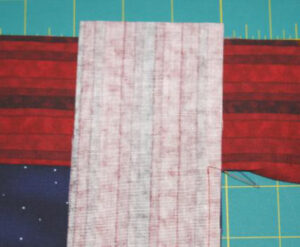
Sew along one side, letting it overhang the width of the border + 1”. Stop sewing ¼” from each end (I backstitch each end). Press to border.
Sew the second side on in a similar manner, stopping a ¼” from the end of the quilt (this will be the same place you stopped the sewing on the first border. It will look like the picture at this point.
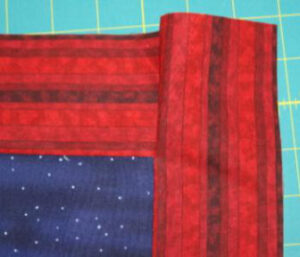
Press border 2 towards the border like in picture 2.
Now, tuck under the free edge so that it makes a 45° angle.
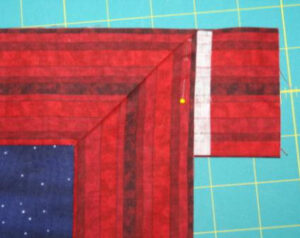
Hint: the wrong side will align perfectly straight with the top border when you have the perfect angle as shown in picture 3.
Make sure your stripes line up like you see in my picture 3. Now pin the edge and angle in place.
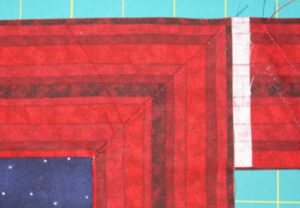
There are 2 ways to finish it off:
- Use invisible thread and top stitch along the angle really close to the edge (picture 4).
I’ve shown the stitching in white so you can see it. - Iron the angle. Then carefully open it up and sew in the crease.
Either way trim away the excess